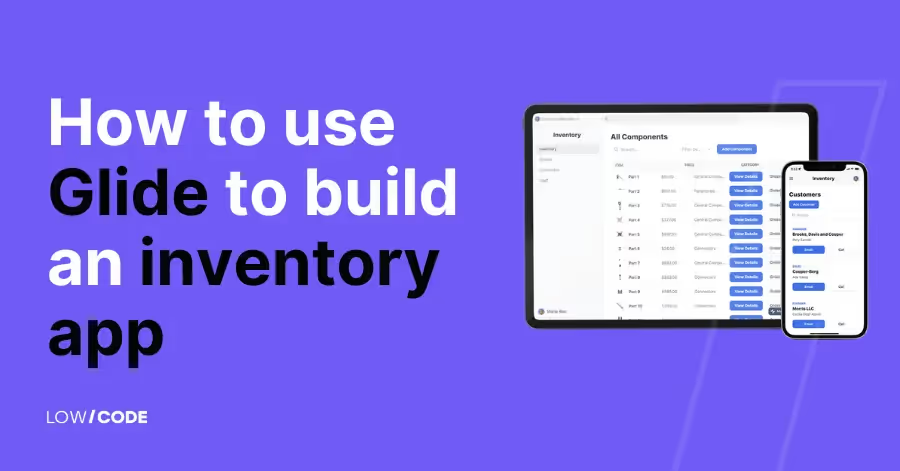
How to use Glide to build an inventory app
6 min
read
Build a no-code inventory app with Glide. Our guide covers setup, customization, security, and the advantages of Glide over other options.

Do you need a custom inventory app? Building a no-code inventory app using Glide is a powerful way to manage your stock efficiently. Glide's user-friendly interface and robust features, including Glide Big Tables, make it a great choice for creating an app that can handle large data sets. Here’s a step-by-step guide to help you get started.
Step 1: Set up your data
Prepare a spreadsheet:
This option is ideal for smaller to medium-sized inventories. Start with a Google Sheet or Excel file containing your inventory data. You can also use Glide's built-in tables for seamless integration and easier management directly within the Glide interface. Organize your data into columns like Item Name, SKU, Quantity, Location, Supplier, and Price.
Like this:
| Item name | SKU | Quantity | Location | Supplier | Price |
|---|---|---|---|---|---|
| Widget A | 001 | 50 | A1 | Supplier X | $10 |
| Widget B | 002 | 20 | B1 | Supplier Y | $15 |
If you already have it, simply sync your Glide app with your current Google Sheets or Excel data.
For larger inventories:
If you have a large inventory, you need a more robust option to handle datasets with millions of rows. That’s how you’ll ensure your app remains fast and responsive.
Here are some options:
Glide Big Tables: For larger inventories, Glide Big Tables can handle up to 10 million rows, ensuring your app remains fast and responsive. This is particularly useful for enterprises with extensive inventory data and the data limit will depend on your pricing plan.
Syncing with your current data set: If you prefer to keep your existing data structure, you can sync your Glide app with your current data. Glide supports various data sources, including BigQuery and SQL databases. If you have an existing data infrastructure, you’ll be able to link with it.
Keep in mind that if you choose to store your data within Glide, data sync can take only 5 to 10 seconds. If you're using an external data source, it might take a little longer.
Step 2: Create your Glide app
Sign up and start a new project:
- Go to Glide and sign up if you haven't already.
- Click on "Create New App" and choose your data sources, such as Google Sheets, Excel, Glide Tables, BigQuery, or SQL.
Connect your data source:
Google Sheets/Excel: Select the spreadsheet you prepared. Glide will automatically import your data and create a basic app layout. Keep in mind you can only add 1 Google Sheet to an app.
Glide Tables: Choose Glide Tables if you created and organized your data within Glide itself.
BigQuery/SQL: If using BigQuery or SQL databases, select the appropriate option and connect your database by providing the necessary credentials and configurations. This is the most complex setup, so you should refer to Glide’s official documentation on BigQuery and SQL.
Step 3: Customize your app
Consider how you want the data to be displayed. You want the best layout for your team and business needs. For example, you'll choose how much information you display on the product's page. A retailer might need additional notes and specifications of the product on sale. Meanwhile, a manufacturing inventory needs to keep managers informed, as they must track raw materials, parts, work-in-progress, and finished goods.
Let’s see how you can build your custom interface and features:
Design your interface:
Tabs: Glide will create tabs based on your data. Rename these tabs to be more user-friendly, such as "Inventory List" and "Suppliers.". Also, rename the Navigation params, especially the slug, so that the URLs can look more human-friendly.
Layouts: Choose a layout for each tab (e.g., list, tiles, or details). For the inventory list, a list or tiles layout works well. However, we recommend using a table component. We'll explain why we prefer tables in the next section.
Add and configure components:
List items: Add components to display item details, such as an image component for product photos or text components for item names and SKUs.
Filters and sorting: Set up filters to allow users to view items by category, location, or supplier. While sorting is not provided natively by Glide in older components, the newest table component offers this feature, allowing users to sort items by clicking on the column headers.
Learn more about advanced filtering in Glide with our video tutorial:
Forms and actions:
Add items: Create a form to allow users to add new inventory items. Include fields for item name, SKU, quantity, location, supplier, and price.
Update inventory: Add actions for users to update item quantities, such as adjusting stock levels when new inventory is received or items are sold.
Learn how to set a form in Glide with our video tutorial:
Step 4: Security and permissions
Next, you want to make sure your inventory app is secure. Glide offers robust security features and permissions to safeguard your data and provide controlled access to different users.
Single Sign-On (SSO):
Single Sign-On allows users to authenticate through a centralized system, making it easier and more secure to manage access. Here’s how to set it up in Glide:
How to enable SSO:
- Go to your Glide app dashboard.
- Click on the app settings icon (gear icon) in the top right corner.
- Go to the Integrations tab and then select Single sign-on.
- Click the Add button.
- Click Connect to Provider and follow the steps to connect with the provider of your choice (e.g., Okta, Azure AD, Google, etc).
Setting up permissions:
Glide allows you to set up different permissions for users to control access to specific data and features within your app.
Roles play a crucial part in managing access and functionality within applications. You can define the actions available to different users based on their assigned roles. For instance, an administrator may have access to advanced settings or features that are hidden from regular users.
Roles should be used in conjunction with Row Owners to securely restrict access to specific data. Then, users will only be able to view or modify information that they are authorized to handle.
That is because while through roles you can control what is displayed in the UI or which records are visible or hidden from view, without row owners the application may still be able to access and download that data in the background.
Let’s see what kind of roles you could set up for your inventory management app:
| Role | Access level | Responsibilities | Example actions & permissions |
|---|---|---|---|
| Administrator | Full access to all features and settings | Manage user roles, configure app settings, add or remove inventory items, and generate comprehensive reports | Update inventory data, adjust stock levels, set permissions for other users, and access advanced analytics |
| Inventory manager | High-level access to inventory data and management features | Oversee inventory levels, track stock movements, and generate regular inventory reports | Add new inventory items, update existing records, track inventory usage, and view detailed reports |
| Employee | Limited access to specific inventory-related tasks | Manage daily inventory operations, such as checking stock levels and recording item usage | View inventory levels, update quantities for items they have access to, and report low-stock items to managers |
| Viewer | Read-only access to inventory data | Monitor inventory levels and usage trends without making any changes | View stock levels and access inventory reports without the ability to modify any data |
Step 5: Test and deploy your app
Testing: Test your app thoroughly to ensure all features work correctly. Check forms, actions, and data display.
Deployment: Once satisfied, you can share your app with your team or make it public. Glide provides options to publish your app as a progressive web app (PWA) that can be accessed on any device.
Why choose Glide for inventory apps
Glide is one of our favorite tools for building inventory apps, especially when compared to traditional coding and other no-code platforms. Here’s why:
Ease of use and speed
Glide vs. traditional coding:
Traditional coding requires significant time and expertise in programming languages, resulting in longer development cycles and higher costs. Glide, with its intuitive drag-and-drop interface, you can build a fully functional inventory app in a fraction of the time
Glide offers a user-friendly interface and seamless integration with Google Sheets, Excel, BigQuery, and SQL databases. While powerful and customizable, Bubble has a steeper learning curve and can be more complex for beginners. Integration with external data sources can also be more cumbersome.
Adalo offers a user-friendly experience but has limitations in handling large datasets and quick data updates compared to Glide.
Customization and flexibility
Glide vs. traditional coding:
Glide allows for easy customization of app components, layouts, and functionalities without writing a single line of code. You can tailor the app to meet your specific business needs.
With traditional coding, everything is customizable, but it requires extensive coding and debugging, which is time-consuming and complex.
Glide vs. Appgyver:
Glide provides a wide range of customizable templates and components, along with powerful features like computed columns for real-time calculations and relational databases for linking related data. Appgyver offers deep customization but can be more complex and requires a higher learning curve compared to Glide’s straightforward approach.
Glide vs. Airtable:
While great for database management, Airtable’s app-building capabilities are limited and less intuitive. It lacks the depth of customization that Glide excels in.
Using templates for your Glide inventory app
In our experience as a no-code development agency, Glide is a strong choice for inventory apps. We've successfully built customized Glide apps for clients, like our recent project for Straightup Collective, a company in the Food & Beverage industry.
Although starting from scratch allows you to tailor the app to your specific needs, using a template can be a quicker and equally effective way to get started. Templates provide a solid foundation with pre-built features, reducing development time and effort while still offering customization options to meet your specific requirements. They are especially useful for businesses looking to implement a functional solution quickly without the need for extensive development work. You can explore a variety of templates for different use cases on the official Glide template gallery, not only for Inventory management but also for other use cases like project management tools, or a customer relationship management system.
If you're interested in exploring Glide for your inventory management, we have a Glide inventory app template you can check out. It includes essential features such as client and order management, product catalog maintenance, and detailed reporting and analytics. And, of course, templates are designed to be adaptable, so you can add or modify features to fit your specific requirements.
Final words
With its robust features, ease of use, and flexibility, Glide stands out among no-code platforms, especially when it comes to data-centric apps like inventory management. Glide allows you to build powerful inventory management apps quickly and efficiently, and can be far more convenient than traditional coding.
It's a great choice for both small inventories using Google Sheets or big projects with large datasets connected externally. Glide’s own solutions, Glide Tables and Glide Big Tables are excellent choices to ensure your app remains fast, responsive, and scalable to meet your growing needs. Having built successful Glide apps, we can assure you that it's a fantastic platform that can grow along with your business.
Do you want to take your project to the next level with Glide? Book a free discovery call today.
Created on
July 1, 2024
. Last updated on
May 7, 2025
.

FAQs


%20(Custom).avif)


