How to translate your Glide apps to any language?
5 min
read
Learn how to translate your Glide apps to any language using Weglot. Expand your user base and improve accessibility with this step-by-step guide.
Translating your Glide apps to multiple languages can significantly expand your user base and improve accessibility. This guide will walk you through the process of using Weglot to translate your Glide apps into any language.
Prerequisites
Before starting, ensure you have:
- A Glide app
- A custom domain
- A Weglot account
Step-by-step guide
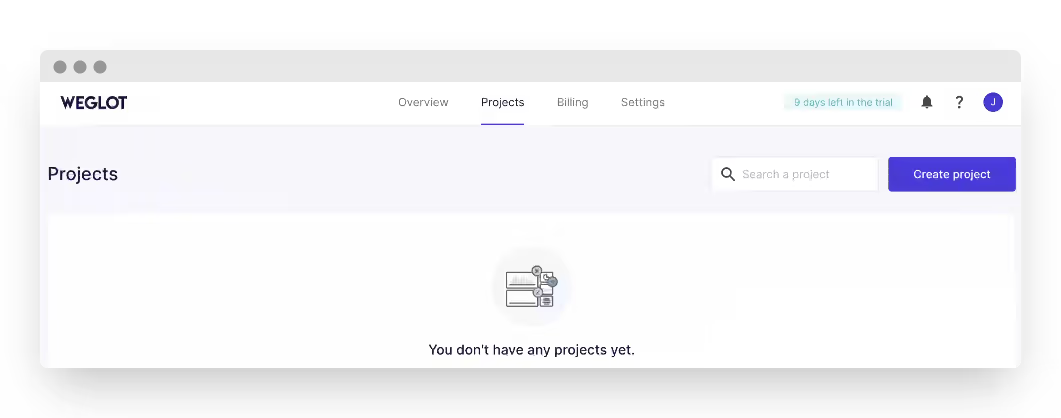
Create a Weglot project
- Log into your Weglot account
- Navigate to the "Projects" section
- Click on "Create a project."
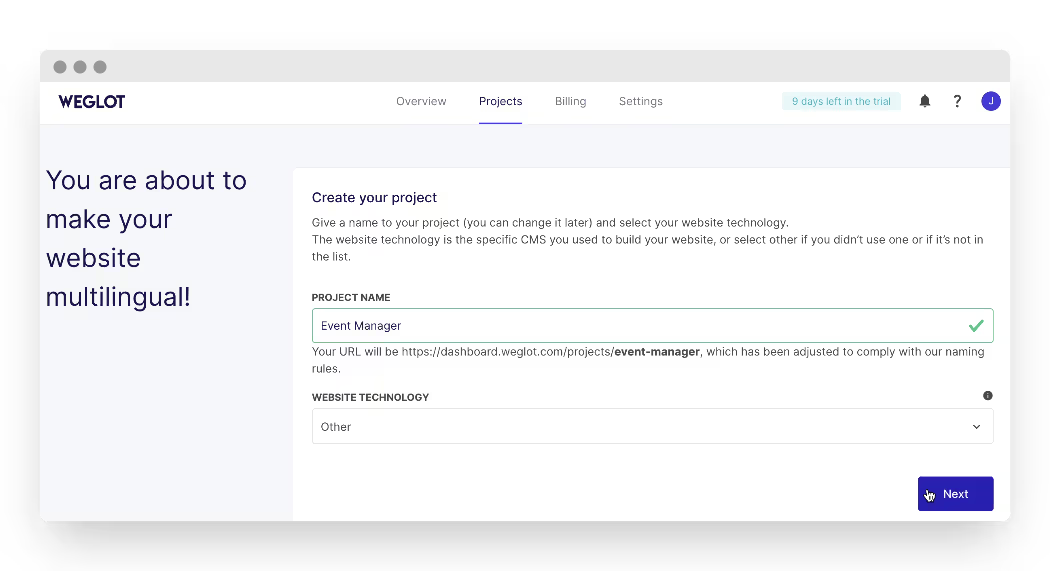
Configure your project
- Name your project (preferably using your Glide app's name)
- For "Website technology," select "Other," as Weglot doesn't offer a specific "Glide app" option
- Click "Next".
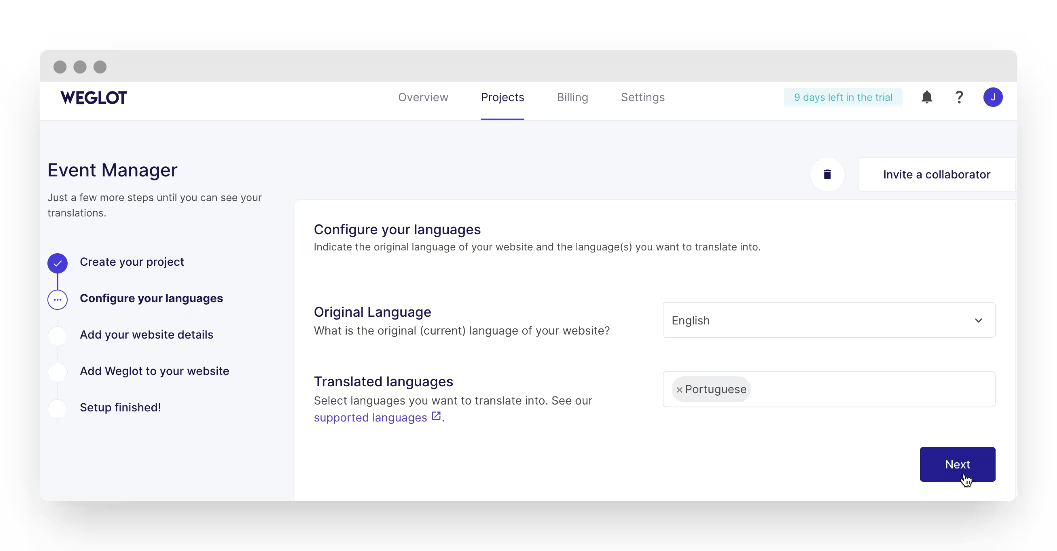
Set up languages
- Select your original language (e.g., English)
- Choose your target language(s) (e.g., Portuguese)
- You can select multiple target languages if needed
- Click "Next".
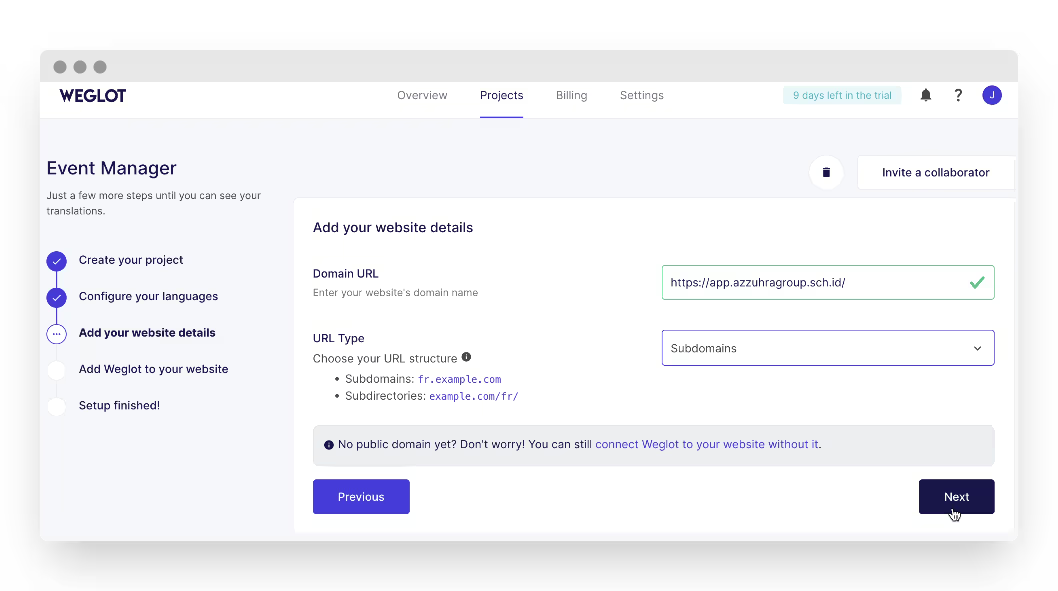
Configure domain URL
- Go to your Glide app and copy the custom domain URL
- Paste this URL into the "URL domain" field in Weglot
- Click "Check" to verify the URL
- For "URL type," select "Subdomain" (this is crucial)
- Click "Next".
Set up DNS
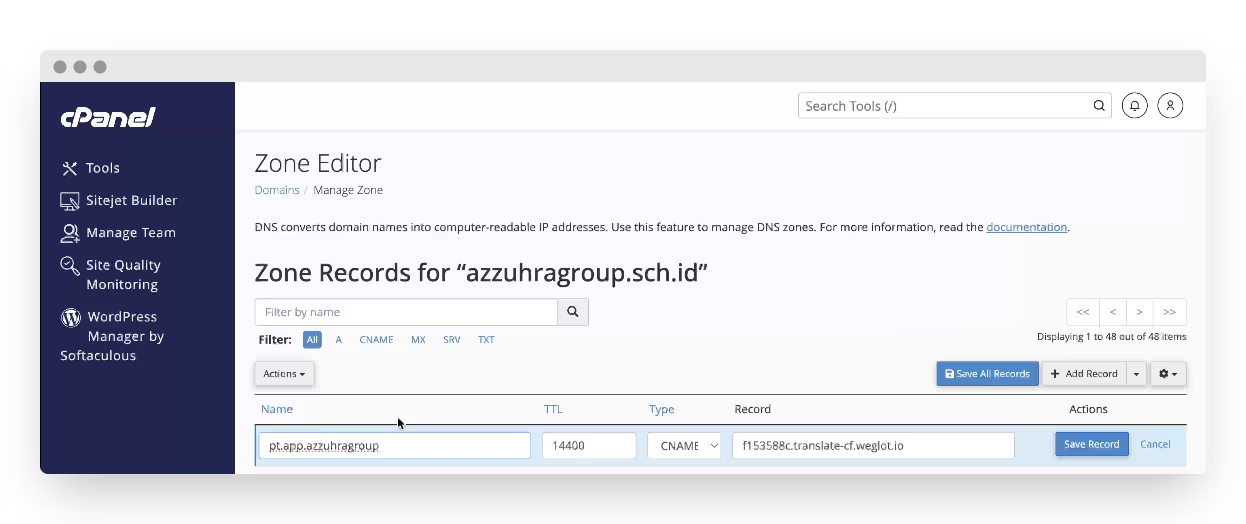
- Copy the provided DNS information from Weglot
- Access your cPanel
- Click "Add record"
- Select "CNAME" as the record type
- Paste the DNS code in the "Record" field
- Enter the project name in the "Name" field
- Save the record.
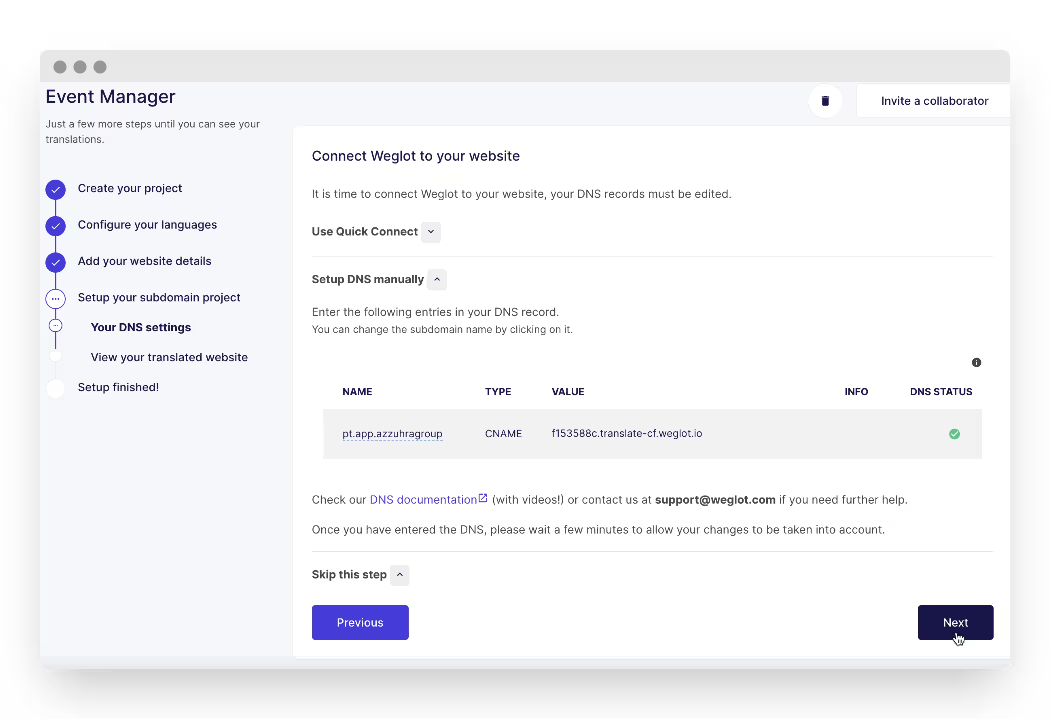
- Then, go back to your Weglot account
- Wait for DNS approval (indicated by a green tick)
- Click "Next" in Weglot.
Finalize project creation
- Wait 5-10 minutes for the domain to be ready
- Refresh the Weglot page
- Click "Go to my translation" once the project is successfully created.

Configure app settings
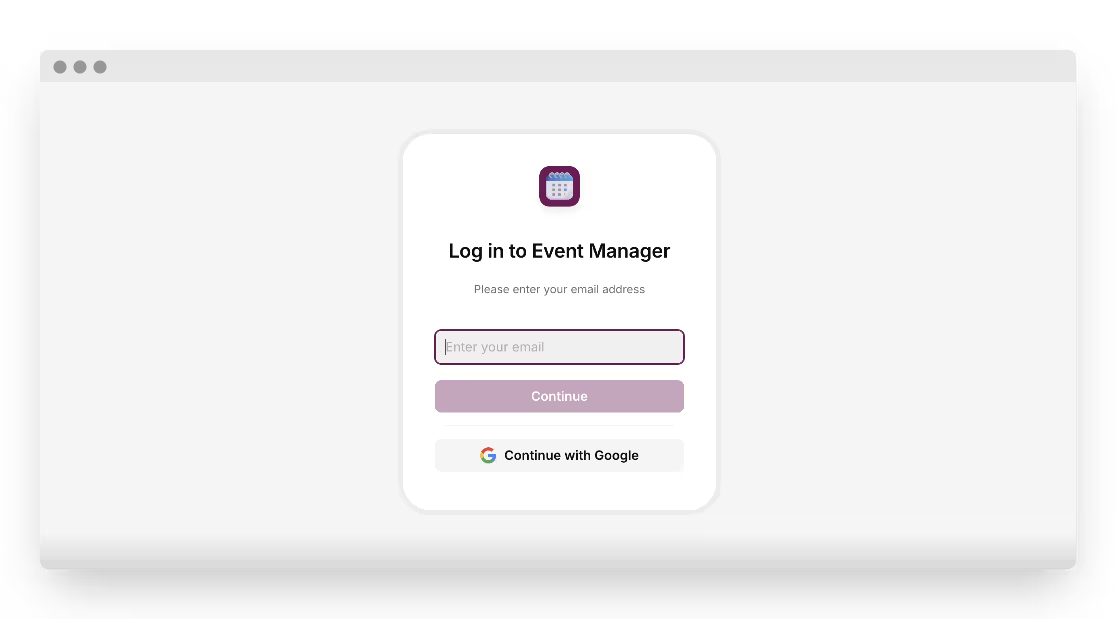
- Access your app using the new domain
- If the login screen isn't translated, go to Weglot's "App Settings."
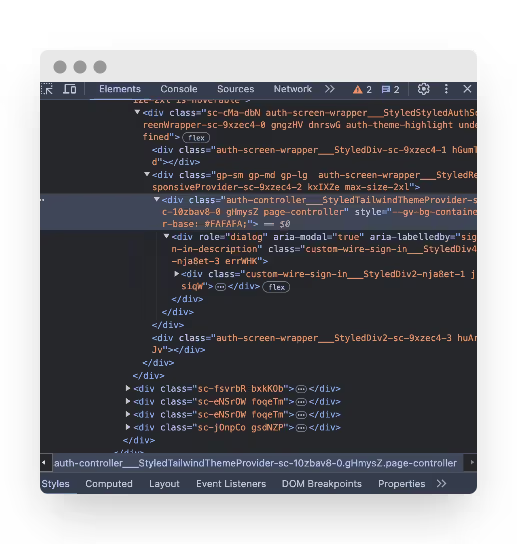
- Add dynamic elements: For the login screen:some text
- Inspect the page and copy the CSS class
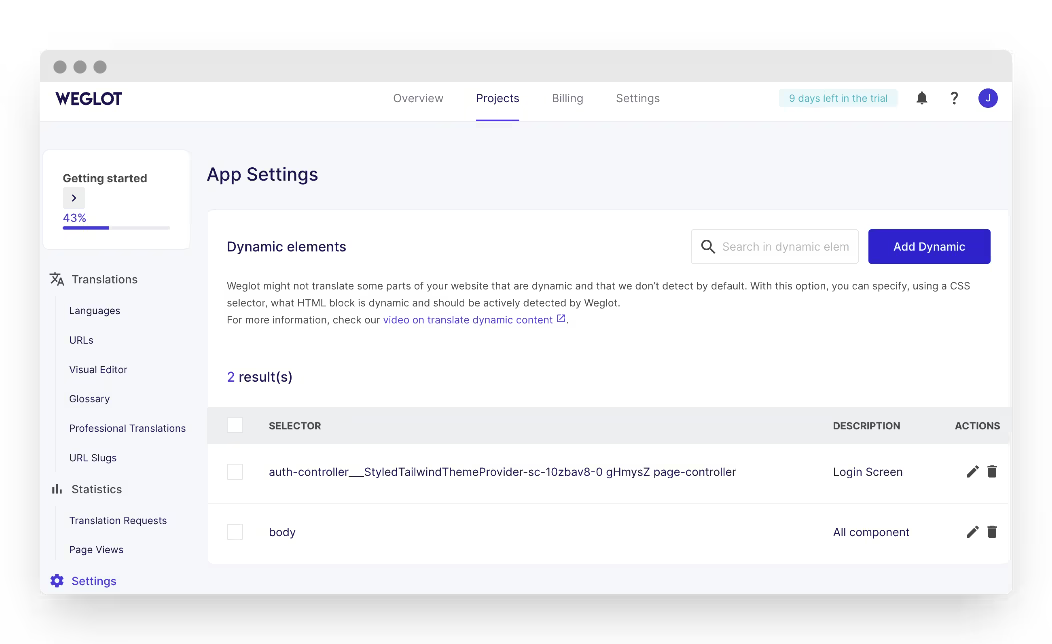
- In Weglot, click "Add dynamic"
- Paste the CSS class in the "SELECTOR" field
- Enter "Login screen" in the "DESCRIPTION" field b. For all components:
- Click "Add dynamic" again
- Enter "body" in the "SELECTOR" field
- Enter "All components" in the "DESCRIPTION" field.
Wait for the translation
- Go to the "Languages" section in Weglot
- Allow 1-2 hours for the translation process to complete.
Verify translation
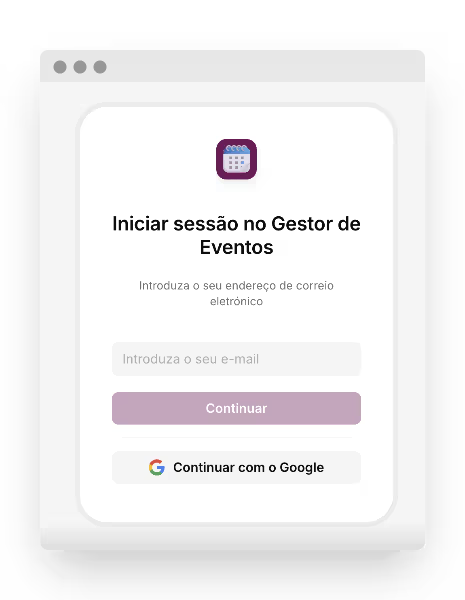
- Refresh your application
- Check that the login page is translated
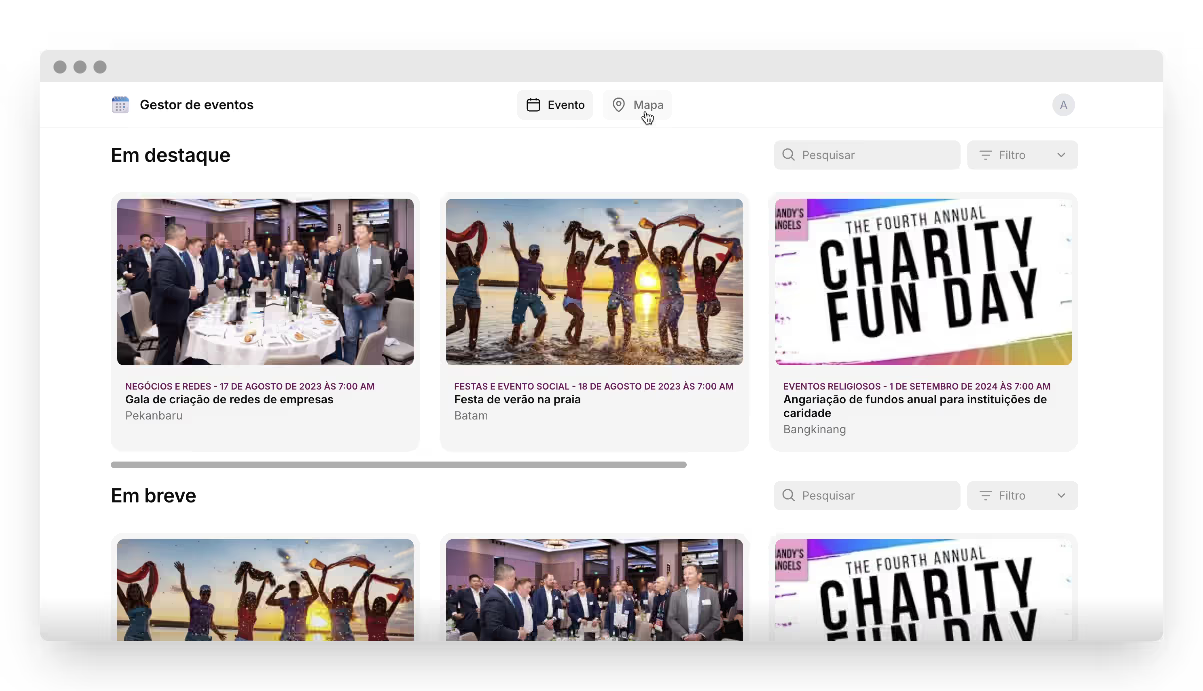
- Log in to verify that all pages and components are correctly translated
Tips for success
- Double-check your DNS settings if you encounter any issues
- Remember to select "Subdomain" as the URL type, not "Subdirectories"
- Be patient during the translation process, as it can take a couple of hours for all elements to be translated
- Regularly review and update translations to ensure accuracy and relevance
By following these steps, you can effectively translate your Glide apps to any language, making your application accessible to a global audience. Remember that while automatic translation is convenient, it's always a good idea to review the translations manually or with the help of a native speaker to ensure accuracy and cultural appropriateness.
Ready to go global? Let Low-code Agency help you translate and optimize your Glide app for international success. Contact us for expert Glide development services today!
Created on
November 11, 2024
. Last updated on
August 29, 2025
.

FAQs
What do I need to start translating my Glide app?
How long does the translation process take?
Can I translate my Glide app into multiple languages?
Is manual review of translations necessary?



%20(Custom).avif)


