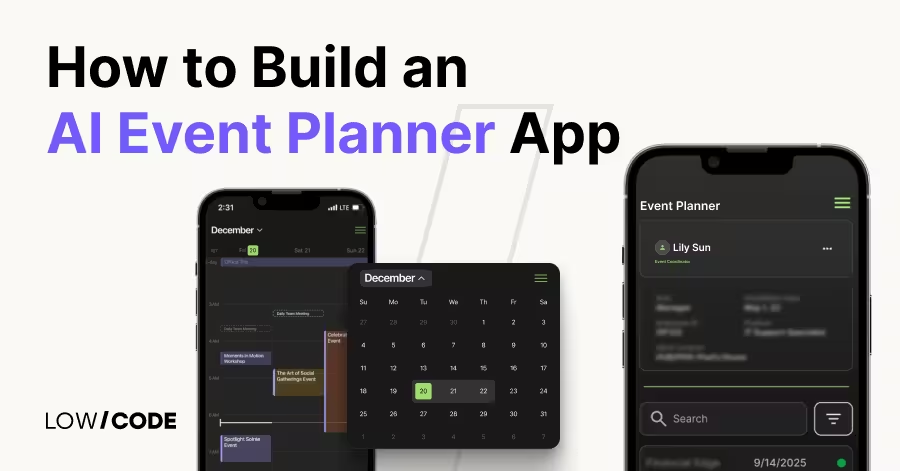
How We build an AI-powered app with Bubble
11 min
read
Learn how to build no-code AI-powered apps with Bubble.io from scratch, We've covered everything from design to AI integration and implementation.


Introduction
Remember when building AI applications meant 9 months of development and 150k down the drain?
Those days are over. Today, Bubble's visual development platform puts the power of artificial intelligence in your hands, with no coding required.
The magic lies in how Bubble combines visual app building with AI capabilities. Instead of writing thousands of lines of code, you can now build smart applications by connecting pre-built components and defining their behavior through a visual interface.
When AI handles repetitive tasks, your application becomes faster and more precise. More importantly, it creates personalized experiences by learning from each user's behavior and adapting content to match their needs.
This guide shows you exactly what you need to learn about using Bubble's visual tools and AI features.
TL;DR
Build advanced web and mobile applications using Bubble's no-code platform combined with AI capabilities. This guide shows you how to integrate AI tools through APIs, design user interfaces, and implement smart features for better user experiences: all without writing code.
Understanding AI integration in Bubble

Bubble AI screen
Adding artificial intelligence to Bubble applications opens up remarkable possibilities for both developers and users. The technology brings two main benefits: it handles complex tasks automatically and creates better experiences for end users.
When AI manages repetitive work, it frees up time and reduces mistakes that often come with manual processing. The real power shows up in how AI shapes each user's experience. The system learns from how people use your app, then adjusts what it shows them.
Think of it like having a smart assistant who remembers what each customer likes and makes suggestions based on their preferences.
Integrating AI via APIs

Making this happen in Bubble is straightforward thanks to the API Connector, which lets you connect your application with AI services like OpenAI.
We will handle the technical steps, and Bubble will allow you to focus on what matters: making applications that work better for your users. The combination of Bubble's visual development platform and AI capabilities means you can build sophisticated applications without getting lost in complex code.
Planning the AI-powered app
Defining the purpose
Before diving into development, a well-structured plan sets the foundation for your AI-powered Bubble app. Consider the specific problems it will address and who will benefit from it.
For example, if you're building a project management app, integrating AI can help users refine tasks, manage time effectively, and track deadlines. Understanding these fundamentals helps you select the right AI features and implementation approach.
Key features and functionalities
Your feature list should include both AI-powered capabilities and standard app functions. Your app's features fall into two main categories:
Core application features:
- User authentication and profiles
- Main dashboard interface
- Activity notifications
- Data storage and management
- User-facing interface.
AI-powered capabilities:
- Natural language processing for text improvement
- Smart content recommendations
- Automated text analysis
- Performance predictions
Prototyping the app
The prototyping phase involves creating wireframes using Bubble's visual editor and mapping user flows. This visual planning helps identify potential challenges early and ensures a logical user experience.
This visual representation helps you:
- Arrange interface elements effectively.
- Plan user navigation flows.
- Identify potential technical challenges early.
- Test different layouts before committing to development.
Time and budget estimation
Consider these key factors when planning your timeline and budget:
Development timeline:
- Initial prototype development
- Core feature implementation
- AI integration setup
- Testing and refinement phases
Develop a clear budget and timeline. Factor in:
- API usage costs from providers like OpenAI
- Your Bubble subscription level
- Additional expenses for plugins and external tools
- Development time for building and testing each feature

Our experience shows that investing in thorough planning reduces long-term expenses significantly. Our team analyzes your requirements and provides detailed timelines and budget projections.
We'll help you make informed decisions about feature prioritization and resource allocation, ensuring your investment yields the best possible results.
Setting up the Bubble app
Starting your AI-powered application begins with establishing a strong foundation in Bubble. Here's how to get your project off the ground.
Creating a new project

- Begin by heading to Bubble and clicking the "Sign Up" button. If you partner with LowCode Agency for your app development, we'll guide you through selecting an appropriate plan based on your project's needs.
- After logging in, navigate to your dashboard and select "Create a new app." You'll need to name your project and decide whether to start with a blank canvas or use a template as your foundation. Complete the setup by clicking "Create App."
Designing the user interface

Bubble’s visual editor works like popular prototyping tools. You can drag and drop elements onto a canvas and see your changes instantly.
The main components include:
- The App Editor serves as your primary workspace for constructing and designing your application. Here, you'll arrange elements, build layouts, and see your design take shape.
- In the Design Tab, you'll find tools to shape your app's visual identity through colors, typography, and styling options. This is where you'll ensure your design works well across different screen sizes.
- The Preview Mode lets you test your application in real-time, helping you catch and fix any display issues before they reach users.
Structuring the database

Bubble's database system forms an essential part of your application architecture. It handles everything from user data to application content through an integrated system that doesn't require external database management.
The platform's native database connects directly with your application components. This means any data you store becomes immediately available throughout your app, making it simple to display and modify information without dealing with complex external integrations.
The Data Tab gives you control over your information architecture. Here, you can:
- Define your data structures
- Create and manage data entries
- Set up relationships between different types of data
- Handle data specific to your AI features.
- Learn more about Bubble capabilities: Bubble pros and cons
Integrating AI Capabilities

Bubble's API connector serves as a bridge between your application and various AI services, including OpenAI, Google AI, Claude.AI, and custom AI models.
The integration process involves three main steps: installing an API connector, setting up API calls, and creating workflows that trigger AI functions based on user actions.
Connecting AI APIs to Bubble
Integrating AI capabilities in your Bubble application starts with establishing the right connections. Here's how to get started:
The API Connector serves as your gateway to AI services. You'll find it in the plugins tab: simply search for "API Connector" and add it to your project. This essential tool manages the communication between your Bubble app and AI services.
For OpenAI integration, the process involves three main steps:
- Get your API credentials by registering for an API key through OpenAI's platform
- Set up the API Connector plugin in your Bubble workspace
- Create a new API configuration named 'OpenAI' and input your API key
To ensure optimal performance, configure your API calls with appropriate model parameters. This helps balance response speed with accuracy, creating a smooth user experience.
Implementing AI Features
After establishing your API connections, you can begin adding AI capabilities to enhance your application's functionality:
Text processing features
- Message summarization systems that condense long conversations
- Extract key points from team discussions
- Project management tools that organize and prioritize task descriptions
- AI Agents to automate tasks, enhance team collaboration, and transform your digital workplace.
Predictive analytics
Using Google Cloud AI services, you can implement:
- Sales forecasting
- Customer behavior analysis
- Pattern recognition in data.
Smart integration practices
When incorporating AI features, focus on solving specific problems rather than adding AI for its own sake. Consider these guidelines:
- Choose AI integrations that address clear user needs
- Consider existing third-party solutions that match your requirements
- Keep implementations focused and purposeful.
Challenges and solutions
Performance constraints
Working with Bubble means adapting to specific technical constraints that ensure system stability. For instance, when making API calls, responses are capped at 50 MB., a limitation that requires careful planning, especially when handling AI-generated content.
These constraints lead to implementing several practical solutions:
- Breaking down large AI responses into smaller, manageable chunks
- Implementing compression techniques for API responses
- Setting up proper error handling for cases where responses exceed size limits
Complex AI logic
Building sophisticated AI applications in Bubble presents specific technical challenges. The platform's database processing capabilities affect performance when handling complex operations or large data volumes. This becomes particularly noticeable in applications that process multiple AI responses simultaneously or manage extensive datasets.
Cost management
Managing expenses for AI-powered applications requires attention to Bubble costs and pricing. The main considerations include:
- API usage monitoring: Track your daily and monthly API consumption to prevent unexpected charges. Set up usage alerts to stay within budget limits.
- Resource optimization: Structure your API calls efficiently to minimize costs. Consider implementing caching for repeated AI operations to reduce unnecessary API calls.
- Budget planning: Account for both Bubble's platform fees and third-party AI service costs in your financial planning. Regular cost analysis helps identify opportunities for optimization while maintaining application performance.
Enhancing AI functionality
Training AI models
Custom AI models
Custom AI models are designed and developed to solve very specific problems within a business. These models are trained on proprietary data, ensuring they are optimized for the company's individual needs.
Custom models require careful planning, from defining objectives to selecting and preparing data and training the model on unique datasets. The output is a solution designed to provide maximum efficiency and effectiveness for the organization's specific business context.
Pre-trained models
On the other hand, pre-trained models are models that have already been trained on large datasets and are available for use without the need for further training.
These models are typically general-purpose, designed to perform a wide range of tasks such as natural language processing (NLP), image recognition, or recommendation systems.
Companies such as Google, Microsoft, and OpenAI provide pre-trained models that are readily deployable for general business applications.
Using Bubble plugins

Bubble's Marketplace offers numerous AI and machine learning plugins that expand your application's capabilities. These plugins connect your app to advanced AI services, allowing you to add features like text analysis, image processing, and predictive modeling.
When selecting plugins, consider factors such as compatibility with your existing setup, documentation quality, and community feedback. Test plugins thoroughly in a development environment before implementing them in your production application.
Building dynamic workflows
AI-enhanced workflows multiply your application's intelligence. By combining Bubble's workflow engine with AI capabilities, you can create sophisticated response patterns to user actions. For example, when a user submits text, the workflow can trigger AI analysis for sentiment, extract key information, or generate appropriate responses. You can chain multiple AI operations, process the results, and update your database accordingly. This creates an interactive and intelligent application that adapts to user input.
The application can make API calls to AI services, process the returned data, and display results in real-time. These workflows can handle complex tasks like document analysis, content generation, or decision support, making your application more capable and responsive to user needs.
App performance and security
Optimizing API calls
Bubble ensures several security practices, and when building your AI application, you'll need to carefully manage your API calls. Here's how you can ensure smooth operation:
- Reduce API call frequency: Store commonly used data locally in your application. This cuts down unnecessary server requests and makes your app more responsive for your users.
- Implement smart data management: Focus on making precise data requests. This will result in faster loading times and better resource usage for both your server and client side.
- Track performance: Monitor your API calls closely to identify and address potential issues early. Use Bubble's analytics to track key metrics like response times and success rates, enabling you to make data-driven improvements.
Securing data
Data protection should be a priority in your app. Focus on both meeting regulatory requirements and ensuring user trust through proper data handling.
Start with careful database planning. Map out exactly what data you need and establish clear privacy guidelines for each type of information. This helps prevent accidental exposure of sensitive details.
For handling sensitive data, take extra precautions. Since Bubble doesn't include built-in encryption for individual fields, add your own encryption layer using external security libraries through API workflows.
Scaling the app

Building scalability within Bubble often requires technical improvements since its built-in database may fall short for greatly complex projects. Adding a separate backend server to Bubble gives you:
- A database that connects related information
- Built-in user account management
- Security features
- Cloud hosting that adjusts to traffic
Building a successful app requires more than just a good user interface. The behind-the-scenes technology affects how well the app can:
- Store and organize data
- Handle many users at once
- Keep information secure
- Run reliably
When companies can work directly with backend servers in Bubble, they can build more capable applications that work well even as usage grows. This creates a strong technical foundation that's reliable and secure.
Testing and debugging
Functional testing
Before launching your AI-powered app, thorough testing ensures everything works as intended. When testing AI features, focus on response accuracy and processing speed. Run multiple tests with different inputs to verify the AI component handles various scenarios correctly.
For workflows and data integration, check that your app properly connects with external services and databases. Test data flows both ways: incoming information should update your database accurately, while outgoing data should reach its destination without errors.
User testing
Getting feedback from real users helps identify issues you might miss. Set up testing sessions where users interact with your app while you observe their behavior. Pay attention to points where they hesitate or seem confused, as these often indicate areas needing improvement.
Make changes based on user insights to enhance the experience. When users point out problems or suggest improvements, document these carefully and prioritize addressing them based on impact and frequency.
As you introduce privacy rules and conditions, your users will start to experience the app differently. Some users may have access to specific parts of your database and app, while others don't. In these cases it's useful to make a habit of testing your app as different users.
For example, if you have two user types, user and admin, it's likely that one has a different access level than the other, and you may miss issues or inconsistencies if you only test as one of them.
Debugging tools in Bubble
When issues arise, Bubble's debugging tools help you identify and fix problems quickly. The built-in debugger lets you monitor your app's behavior in real-time, making it easier to spot where things go wrong.
Here's how to use the debugger effectively:
- Access the debugger: Once in the development environment, preview your app by clicking on the "Preview" button. This will open your app in a new tab with a debugger visible at the bottom.
- Check workflow execution: The debugger allows you to step through workflows step-by-step, ensuring each action triggers as expected.
- Investigate page states: Use the debugger to inspect elements' states, check data sources, and track any error messages.
- Toggle between states: Through the debugger, simulate various conditions such as user authentication states or different user roles to see how the app reacts.
Monitor API logs and error responses to catch integration issues early. The logs show you exactly what data is being sent and received, helping you spot any communication problems between your app and external services.
Deployment and maintenance
Preparing for launch
Your app's branding and UX deserve careful consideration before launch. Review all visual elements including logos, color schemes, and typography. Test the user interface thoroughly across different devices and screen sizes. Pay special attention to how the AI features integrate with the overall design to ensure a smooth user experience.
Launching the app
Deploying your app marks the transition from development to real-world use. When you move your application from the Development environment to the Live environment, it becomes available to your end-users.
Before deployment, run comprehensive tests of all AI functionalities. Check that API connections work correctly and that the app handles different user scenarios appropriately. Consider a soft launch with a smaller user group to gather initial feedback and identify any issues.
Post-launch maintenance
Keep a close eye on your AI API costs and usage patterns. Set up monitoring systems to track API calls, response times, and error rates. Create alerts for unusual spikes in usage or costs. This data helps you adjust your infrastructure and pricing strategy as needed.
Stay current with regular updates to both AI models and app features. Monitor the performance of your AI components and implement improvements based on user feedback.
Advanced considerations
Incorporating advanced AI features
Your app gains significant power when you add sophisticated AI capabilities. Let's explore three advanced features to implement in Bubble to make your application more intelligent and responsive.
- Natural Language Processing (NLP): By integrating NLP into your Bubble app, you help users interact with your application in a more natural way. Your app can understand and process text input, making it easier for users to search, filter, and find what they need.
- Sentiment analysis: Adding sentiment analysis helps your app understand the emotional tone behind user interactions. This feature examines text input—like reviews, comments, or feedback—and determines whether the sentiment is positive, negative, or neutral. You can use this information to sort customer feedback, prioritize support tickets, or monitor brand perception automatically.
- Predictive analytics: This feature analyzes patterns in your data to forecast future trends and behaviors.
Comparison with other platforms
When you select a platform for building AI-powered applications, understanding the strengths and limitations of each option helps you make an informed decision. Here's how Bubble compares to other popular no-code platforms:
FlutterFlow

FlutterFlow's AI capabilities provide users with:
- Built-in support for conversational features through the SDK, which helps you add chatbots and automated responses
- Direct connection to ChatGPT and Claude through their respective APIs
- Pre-built components for voice commands and natural language processing.
However, FlutterFlow requires more technical knowledge to implement complex AI features, especially when working with third-party services.
Glide

Glide stands out with its OpenAI integration, which comes included even in their free plan. The platform offers:
- Simple setup process for OpenAI API integration
- Free access to AI capabilities (excluding OpenAI usage costs)
- Straightforward implementation of AI features without extensive coding.
Bubble's advantages
Bubble provides a wide flexibility in AI integration:
- Support for multiple AI services via APIs
- Visual development of AI features without coding
- Ability to combine different AI services in one application
- Direct database integration for AI-powered data processing.
Conclusion
Building AI applications on Bubble takes technical knowledge of both the platform and AI systems. Success requires careful attention to how the system is built, how well it performs, and how to keep it secure. Working with experienced developers helps ensure your application is well-built and makes the most of AI capabilities.
Get your AI application built right the first time with LowCode Agency's experienced Bubble developers. Schedule a free consultation to discuss your project with us.
Created on
February 24, 2025
. Last updated on
June 23, 2025
.

Jesus is a visionary entrepreneur and tech expert. After nearly a decade working in web development, he founded LowCode Agency to help businesses optimize their operations through custom software solutions.


%20(Custom).avif)


FAQs
How much technical knowledge do I need to build an AI-powered app with Bubble?
What types of AI features can I add to my Bubble application?
How long does it take to build an AI-powered app with Bubble?
How can I integrate a chatbot with my Bubble website?
Related Articles

AI
AI no-code inventory management tools
Discover how AI no-code inventory management tools can revolutionize your business operations and prevent costly inventory tracking mistakes.

Bubble
Is Bubble.io secure? A review and best practices
This article covers Bubble.io's security features, compliance, and best practices. Learn how to approach security as a business owner

Bubble
What type of apps can you build with Bubble.io in 2025
This article showcases diverse application types you can build with Bubble, from niche marketplaces and industry-specific job boards to streamlined booking systems. Discover how Bubble.io's no-code approach, coupled with its robust features like payment gateways and customizable interfaces, empowers

Comparison
Bubble
Adalo vs. Bubble: A comprehensive comparison
Adalo or Bubble? You want to choose the right no-code platform for your app development project. Discover which platform suits your needs best!
.avif)